Hello crafty friends,
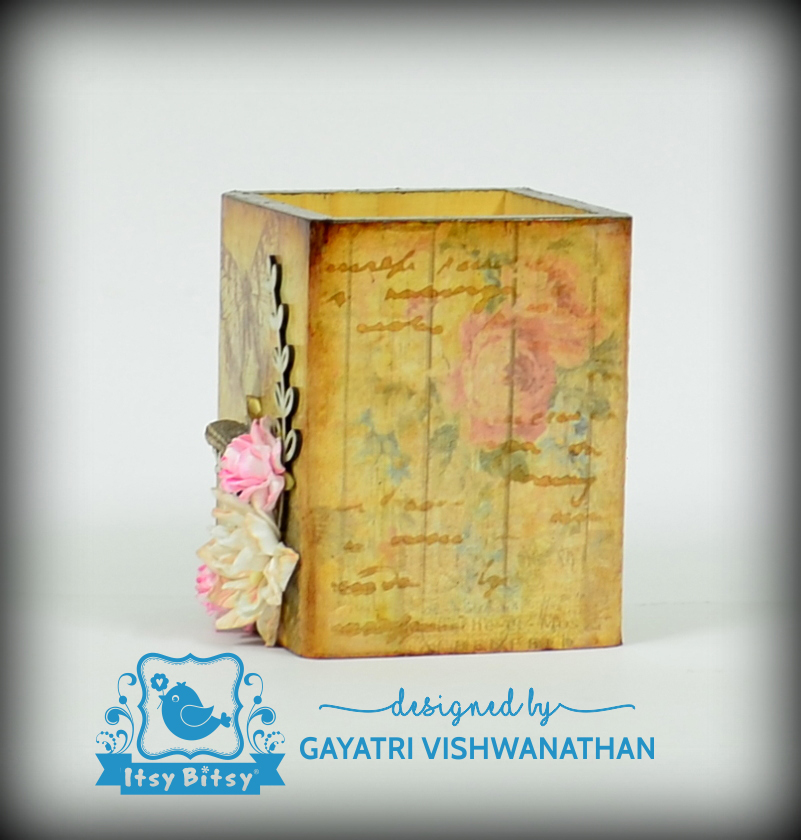
Today I am sharing a simple decoupaged pen holder as my DT project for Itsy Bitsy. I have used the decoupage papers from Little Birdie. Before I get into my project, I would like to share my views on them. The papers are 70 gsm in thickness and this makes it thick as well as pliable. It is very easy to work with and you hardly get any wrinkles if you are careful. I generally love to work with decoupage napkins because they are thin, but these papers are just fantastic that I am in love with them. So go ahead and try out, even beginners can work with them easily.
So let me get into my project. I will be sharing few tips as I explain my project.

Main materials required for decoupage. A wet wipe or a wet cloth should be handy.


Always frayed edges blend easily than straight cuts which are easily visible. I applied water to the edges with paint brush and gently tore along the edges. The paper being thin, we can easily do this. You can paste the paper throughout, but I wanted matching patterns on opposite sides, so used four pieces of decoupage paper.

Apply an even coat of decoupage glue. You have Gloss and Matt finish. I have used Matt finish.


Use a nail filer or fine sand paper to file away the excess paper. Since the paper is thin, we can file away easily as we do for tissues.

Mix chalk paints 'Snow' and 'Lemon chiffon'. I added a touch of brown acrylic paint to get the color. Touch up the edges to blend. Ink the edges and you can stencil patterns at this time. I have used script stencil.

Apply a coat of decoupage glue. Allow to dry.

Add two/ three coats of varnish allowing each coat to dry for at least half an hour in between.


Added few chipboard elements and flowers. I fussy the butterfly and applied decoupage glue on the back side. I added a blob of hot glue on the back side under the wings and allowed it to dry to get dimensional effect. I stuck it hot glue onto the holder. Here are some more pictures of my project:


Materials used:
 |
| Decoupage Paper |
 |
| Pen Holder |
 |
| Decoupage Glue |


Till next time - Happy crafting!!
Gayatri


